 |
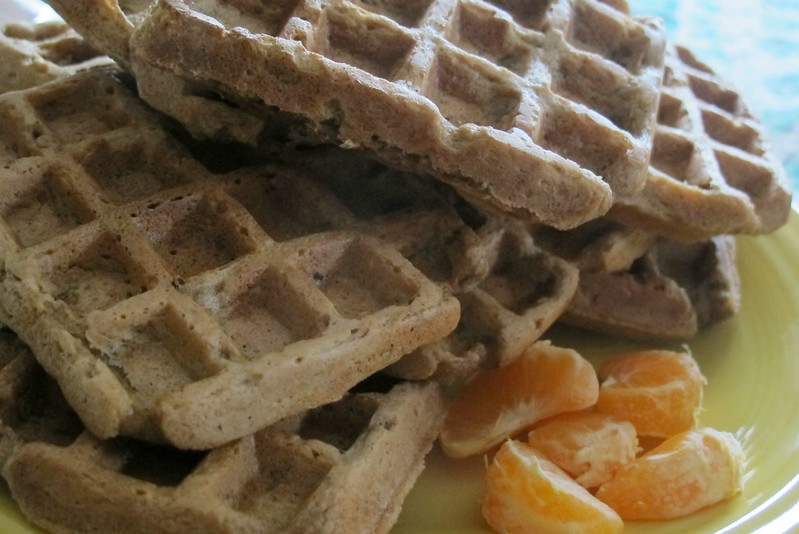
| WAFFLES! |
Let me tell you how the magic began...
I can't begin to describe how elated I am to finally break through the waffle drought that has been going on here. I even resorted to eating a frozen SAD* waffle last week because it's been 3 years since I have eaten a decent waffle. When you are going gluten, egg, dairy, oil free let me tell you, this is about the toughest recipe to recreate. I had about given up. Then my daughter turned me on to the Japanese mochi waffle craze and I began to see the light. If it was possible to crisp a rice only based waffle, then there was hope.
I had previously tried the Engine2 recipe for Zeb's waffles, but these also failed for me. Now, armed with new hope that I could make it work, I adapted Zeb's recipe to the ratio I use in my gluten-free muffins and things began to click. What shook out was WAFFLES! Two things are important in making this work.
1. There is no added sugar in the recipe.
2. You have to cook these 8 minutes in the waffle iron.
With the longer cooking time it is important not to have the added sugar to prevent burning and sticking since oil is not used.
I will let you in on one other secret that I have been playing around with. That is the addition of sourdough starter. This seems to be the magic in gluten-free cooking to get the lightness in the bake. It may seem like a bothersome step, but if you want the magic you have to learn to spell! It takes just a few days to create the sourdough starter, but you will be turning out amazing stuff once you have it on hand. Stick around and I will hook you up to the steps to get started.
Magic Waffles
Makes 12 6'' waffles.
Preheat waffle iron. Preheat oven to 200 degrees.
2 ½ cups of oat flour
¾ cup of ground, toasted sunflower seeds
¼ cup ground flax seeds
¾ t. cinnamon
½ t. salt
⅛ t. fresh grated nutmeg
2 cups sliced bananas, mashed
½ cup sourdough starter
3 cups almond milk
1 t. vanilla
Grind you seeds and oatmeal into flour. Directions are here.
Measure all the dry ingredients into a bowl and whisk very well.
Mash the banana slices in a separate bowl and then whisk in the other liquids. Combine the liquid into the dry, making sure you have incorporated all.
Scoop batter into each section of waffle iron. Mine took about ½ c. per 6'' waffle. Spread the batter out to fill in the square. Close lid and set timer for 8 minutes. There will be a lot of steam coming from the iron. At the end of 8 minutes, your waffle iron should indicate that the waffle is ready. The lid should release from the waffle, easily. If it doesn't, give it another minute or two. I use a chopstick to pop the waffles out from the iron.
Keep the waffles warm by placing them directly on the oven rack in a 200 degree oven. I tried stacking on a plate, but this softened them. Directly on the oven rack works best. Continue with the remaining batter until you have used it all up. Serve the waffles immediately or cool them and place in sandwich bags to freeze. These crisp up well in the toaster oven and have lots of crunch.
Sourdough starter or Casting the Spell
I developed my starter from these instructions using kombucha. If you go this direction, use GT original kombucha that you have allowed to sit at room temperature for a few days. You want the komboucha to start to turn more acidic from fermentation. Here are pictures to show you how the sourdough will look as it matures. I try to add ½ cup of oat flour everyday with ½ cup filtered water. Occasionally I will add 1 t. of sugar to the starter to encourage the yeast to develop. Always leave ½ cup of starter in the jar to start the process over. My starter lives on my counter in a quart mason jar with a lid on it.
If you add sourdough starter to your gluten-free recipes you will have noticeable 'lift' in the bake. I generally add ½ cup to the recipe and lengthen the bake time by a few minutes.
*Standard American Diet

You are a genius! Why don't more people know about you?!
ReplyDeleteYou can tell as many people as you like! I will probably be eating these everyday to fill up the empty waffle space in my life that the 3 year drought created! YIPPEE!
Delete